Bulk Campaigns
Bulk campaigns let you send a message to every contact in a table at once. You can send personalized text messages or WhatsApp-approved template messages (Cloud API only).
Creating a Campaign
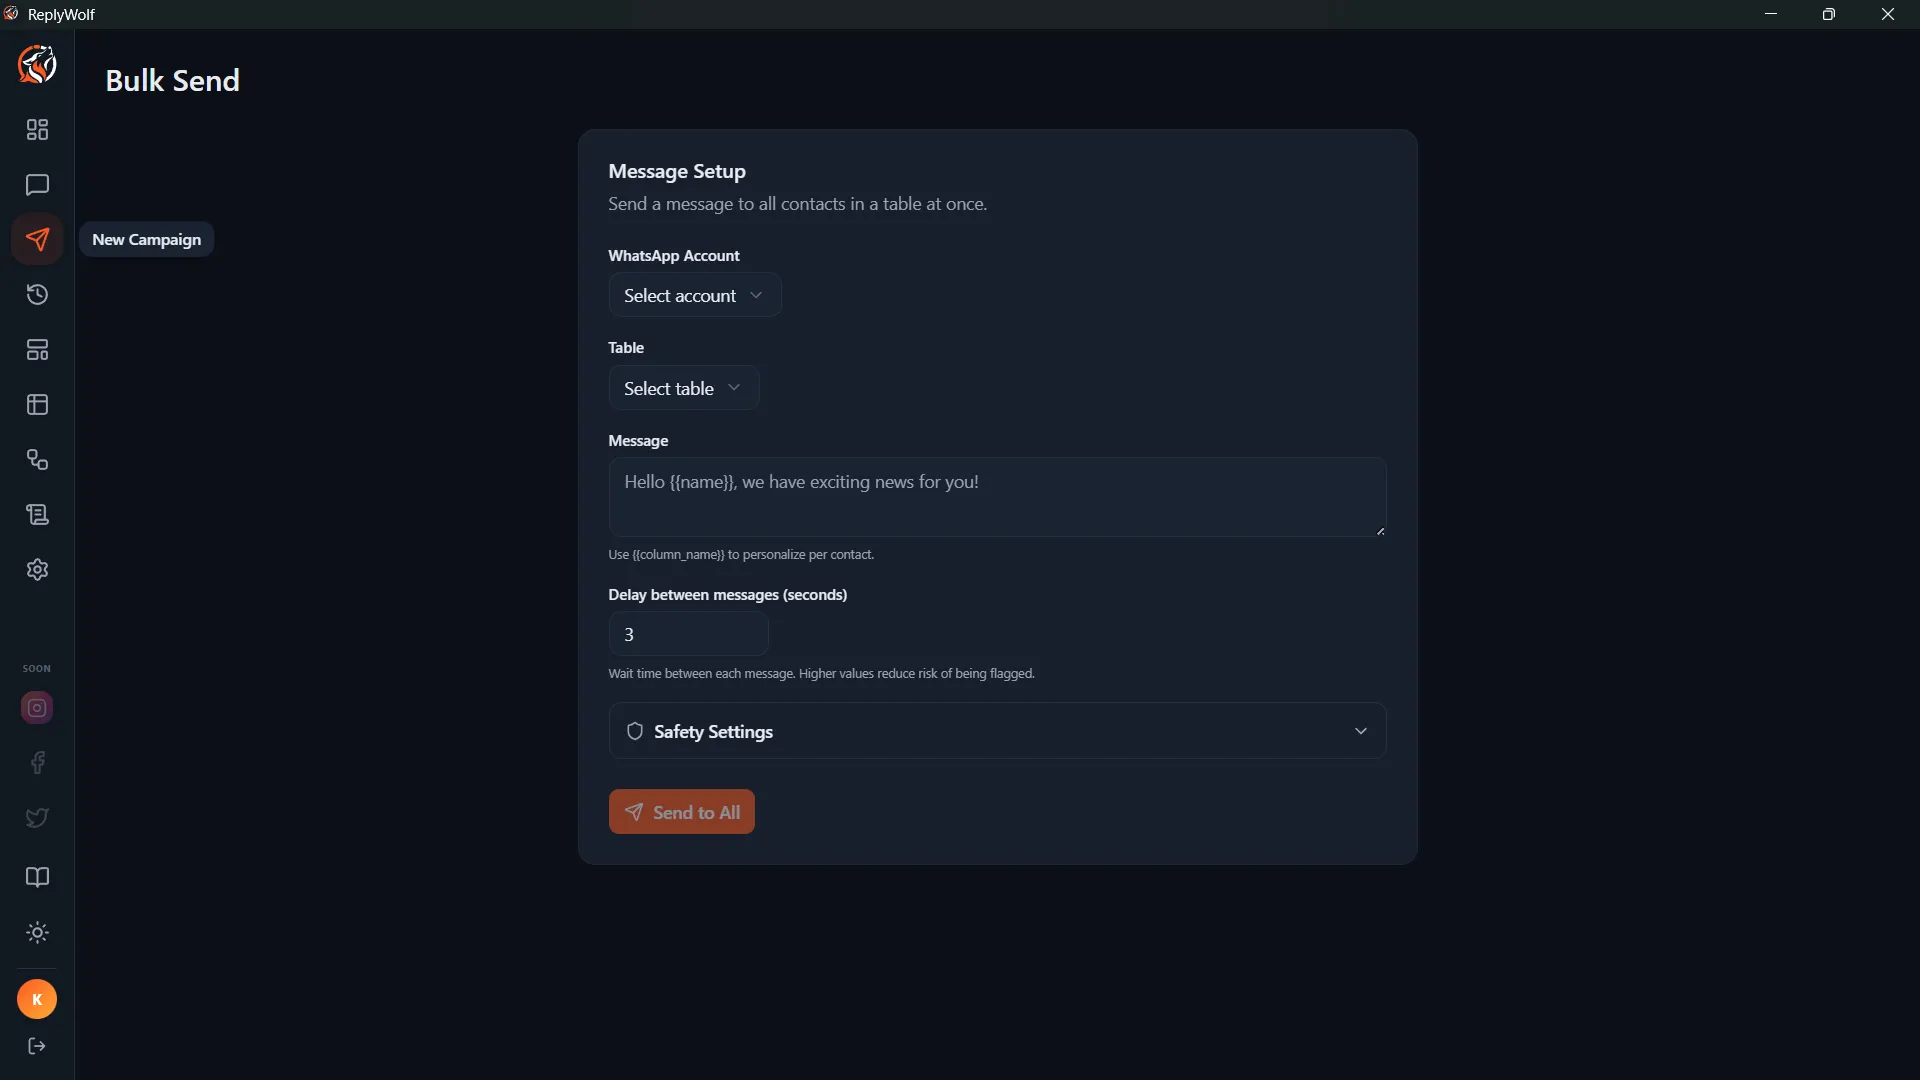
Navigate to the Bulk Send page to set up a new campaign.
Step 1: Select WhatsApp Account
Choose which connected WhatsApp account to send from. Only accounts with a "connected" status are shown. If you do not see any accounts, connect one in Settings first.
Step 2: Select Table
Choose the table that contains the recipients. The table must have at least one phone number column.
Step 3: Choose Phone Column
Select which column contains the phone numbers. ReplyWolf auto-detects phone columns, but you can change the selection if needed. Phone numbers should include the country code (e.g. 919876543210).
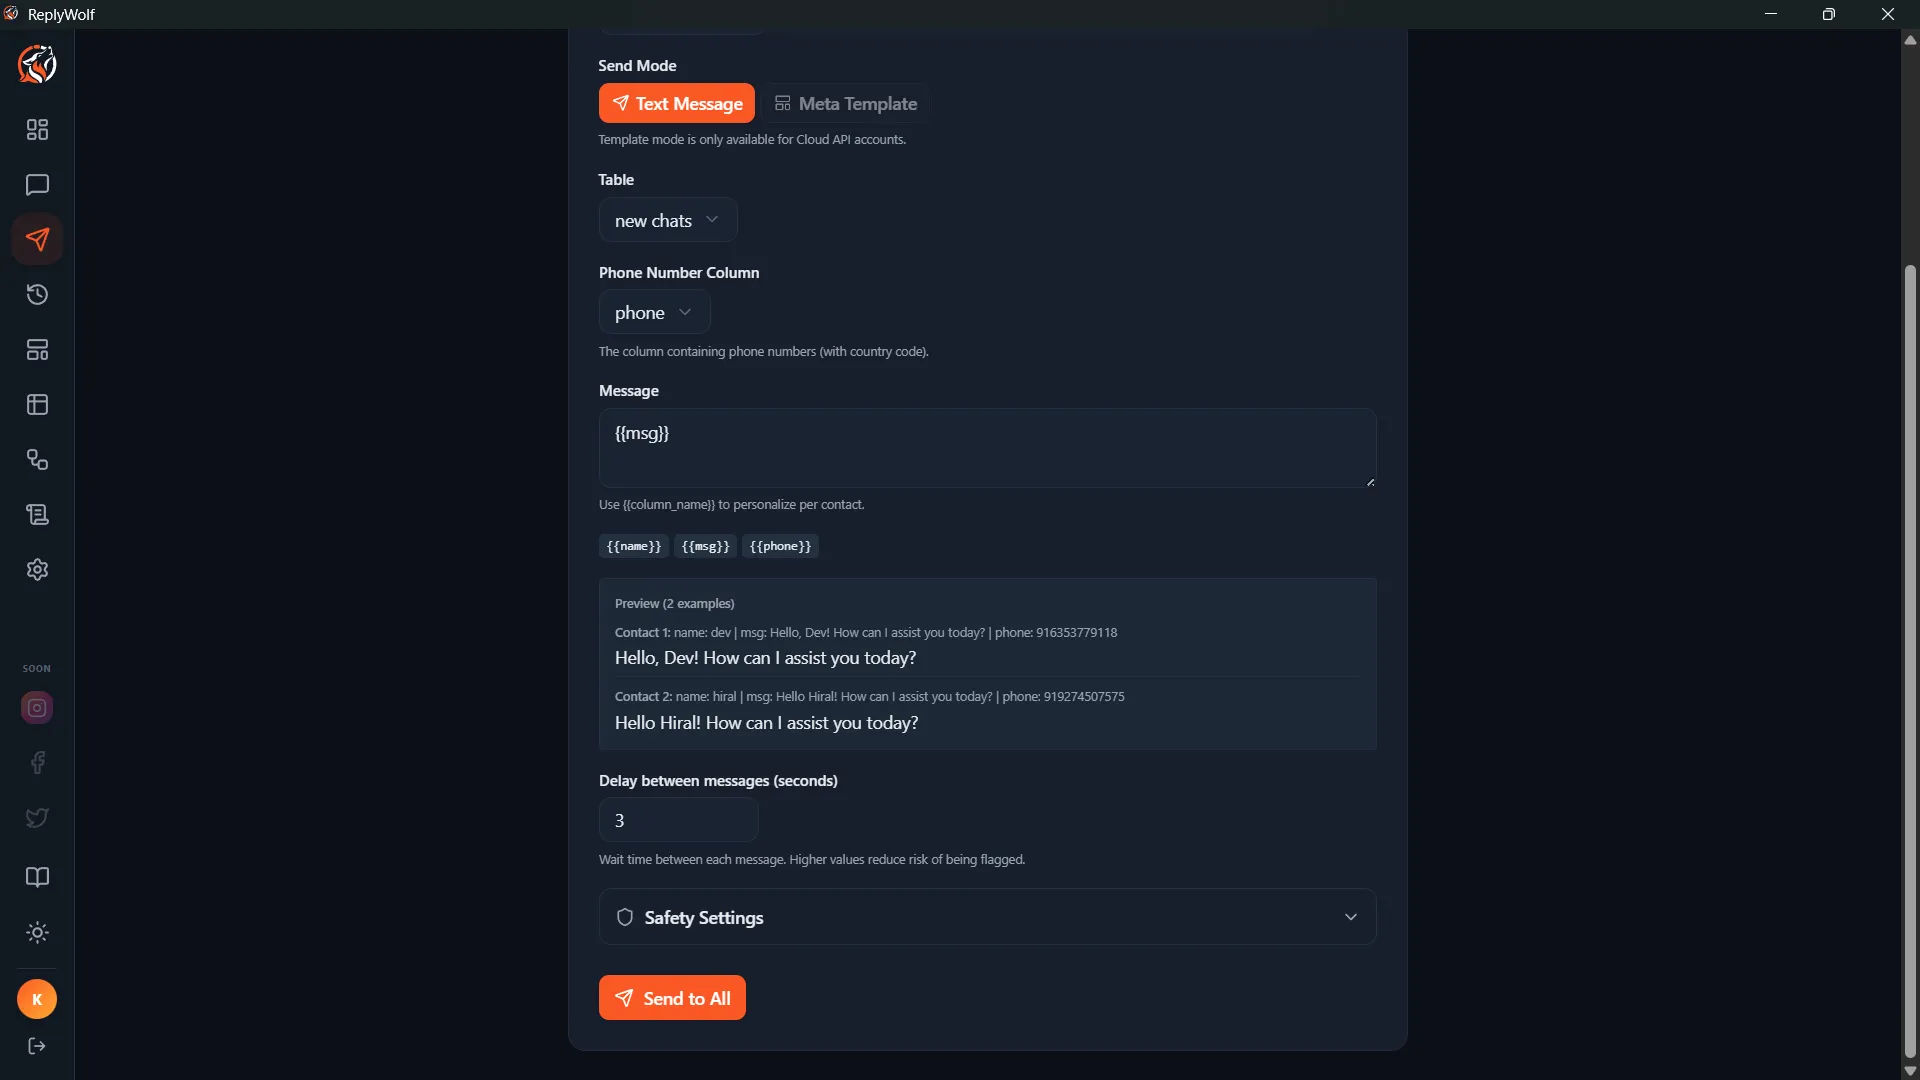
Step 4: Choose Message Type
You have two options:
- Text Message -- Write a plain text message. Available for all account types.
- Template Message -- Select a pre-approved WhatsApp template. Only available for Cloud API accounts.
Text Messages
Write your message in the text area. You can personalize messages using variable placeholders that map to your table columns.
Using Variables
Type {{column_name}} to insert a placeholder that gets replaced with each contact's data. For example:
Hi {{name}}, your appointment is on {{date}} at {{time}}. See you there!
Clickable variable chips are shown below the message box -- click one to insert it at the cursor.
Message Preview
A live preview shows how the message will look for the first few contacts in your table, so you can verify the variables are working correctly.
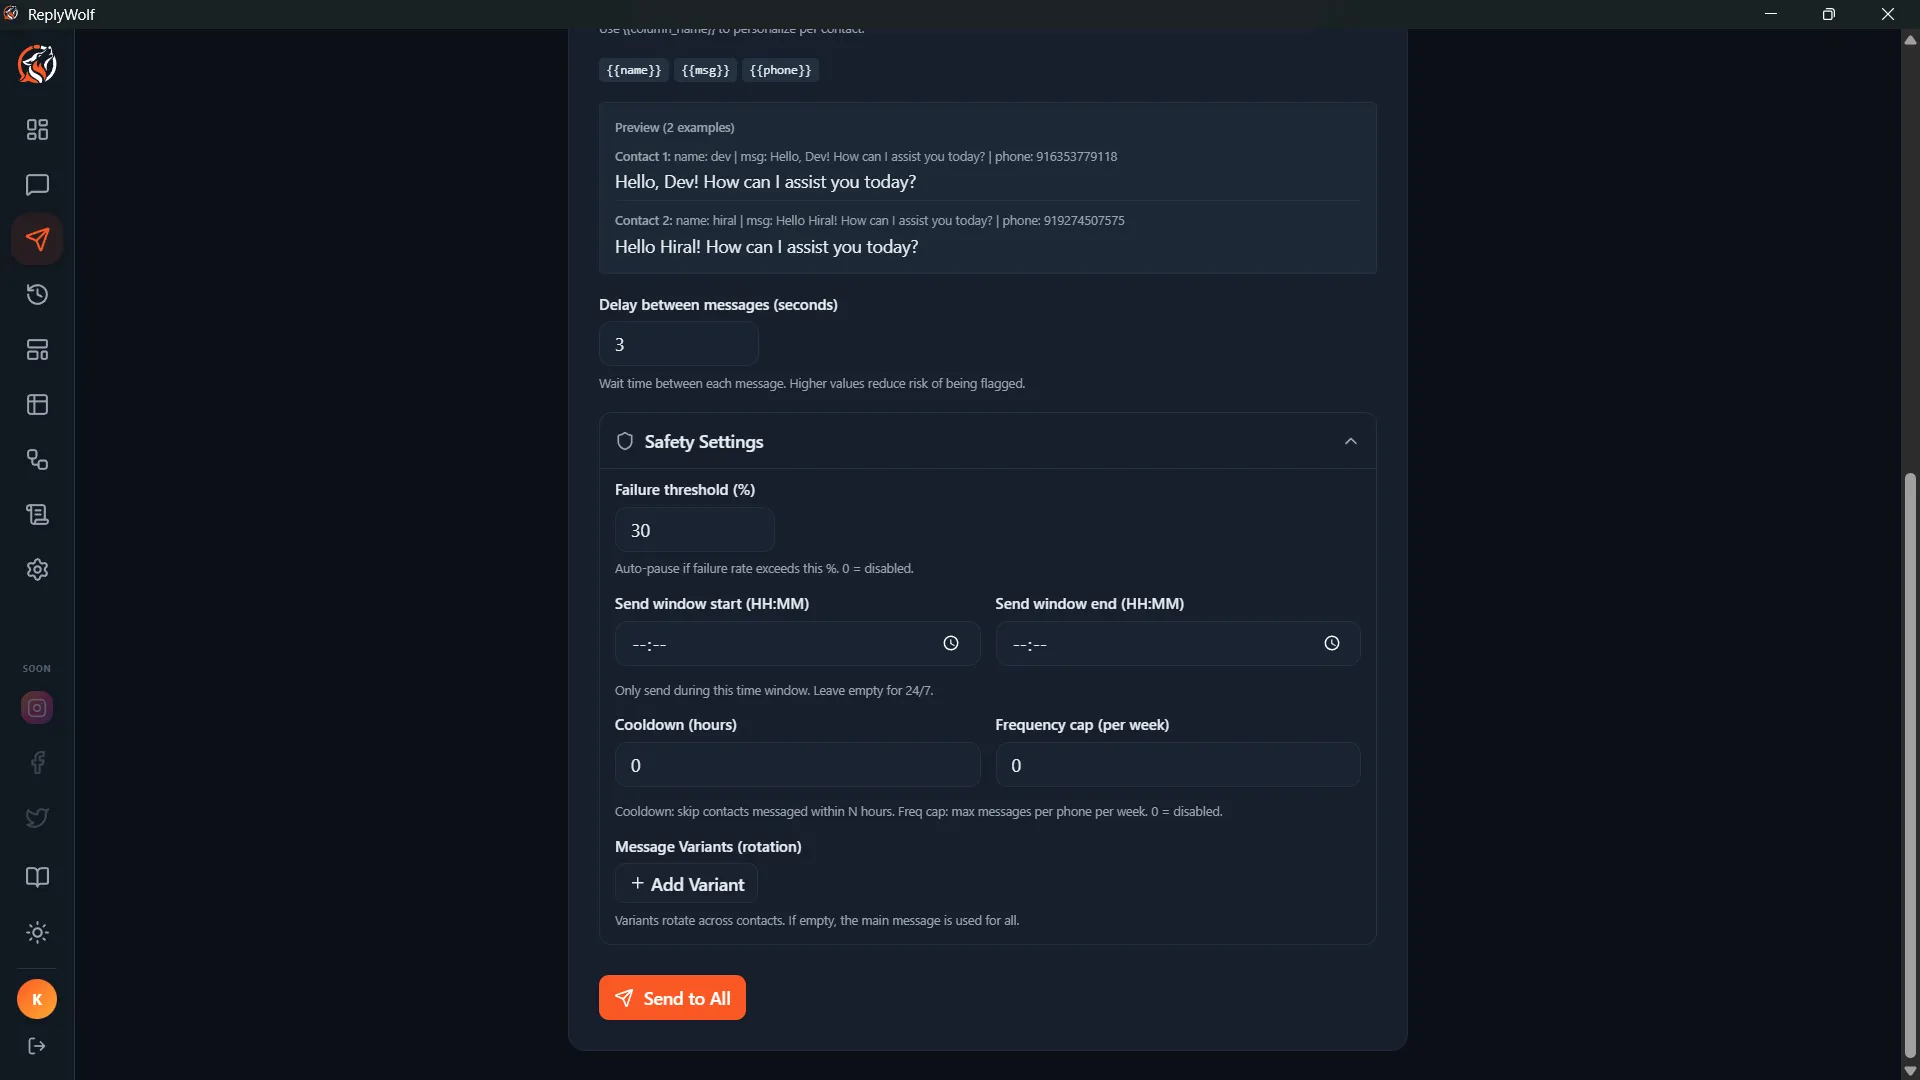
Message Variants
Under Safety Settings, you can add message variants for A/B testing. Add multiple versions of your message, and ReplyWolf will randomly pick one for each contact. This helps avoid sending identical messages to every recipient, which can reduce the risk of being flagged as spam.
Template Messages (Cloud API)
If you selected a Cloud API account, you can switch to Template Mode to send an approved Meta template.
- Select a template from the dropdown (only APPROVED templates are listed)
- Map each template variable (
{{1}},{{2}}, etc.) to a column in your table - Preview how the template will look with real contact data
Safety Settings
Click the Safety Settings section to expand additional controls that help protect your account.
Delay Between Messages
Set the number of seconds to wait between each message. Higher values reduce the risk of being flagged by WhatsApp. The default is 3 seconds.
Failure Threshold
Set a percentage (e.g. 30%). If the failure rate exceeds this threshold, the campaign automatically pauses so you can investigate. Set to 0 to disable.
Send Window
Restrict sending to certain hours of the day. For example, set "09:00" to "18:00" to only send messages during business hours. Leave empty to send around the clock.
Cooldown
Skip contacts who were already messaged within the last N hours. This prevents you from bombarding the same person if you run multiple campaigns close together. Set to 0 to disable.
Frequency Cap
Set the maximum number of messages a contact can receive per week across all campaigns. Set to 0 to disable.
Running a Campaign
Click Send to All (or Send Template to All for template mode) to start the campaign.
Progress Tracking
While a campaign is running, a progress card shows:
- A visual progress bar
- Counts for sent, failed, and skipped messages
- The current status message
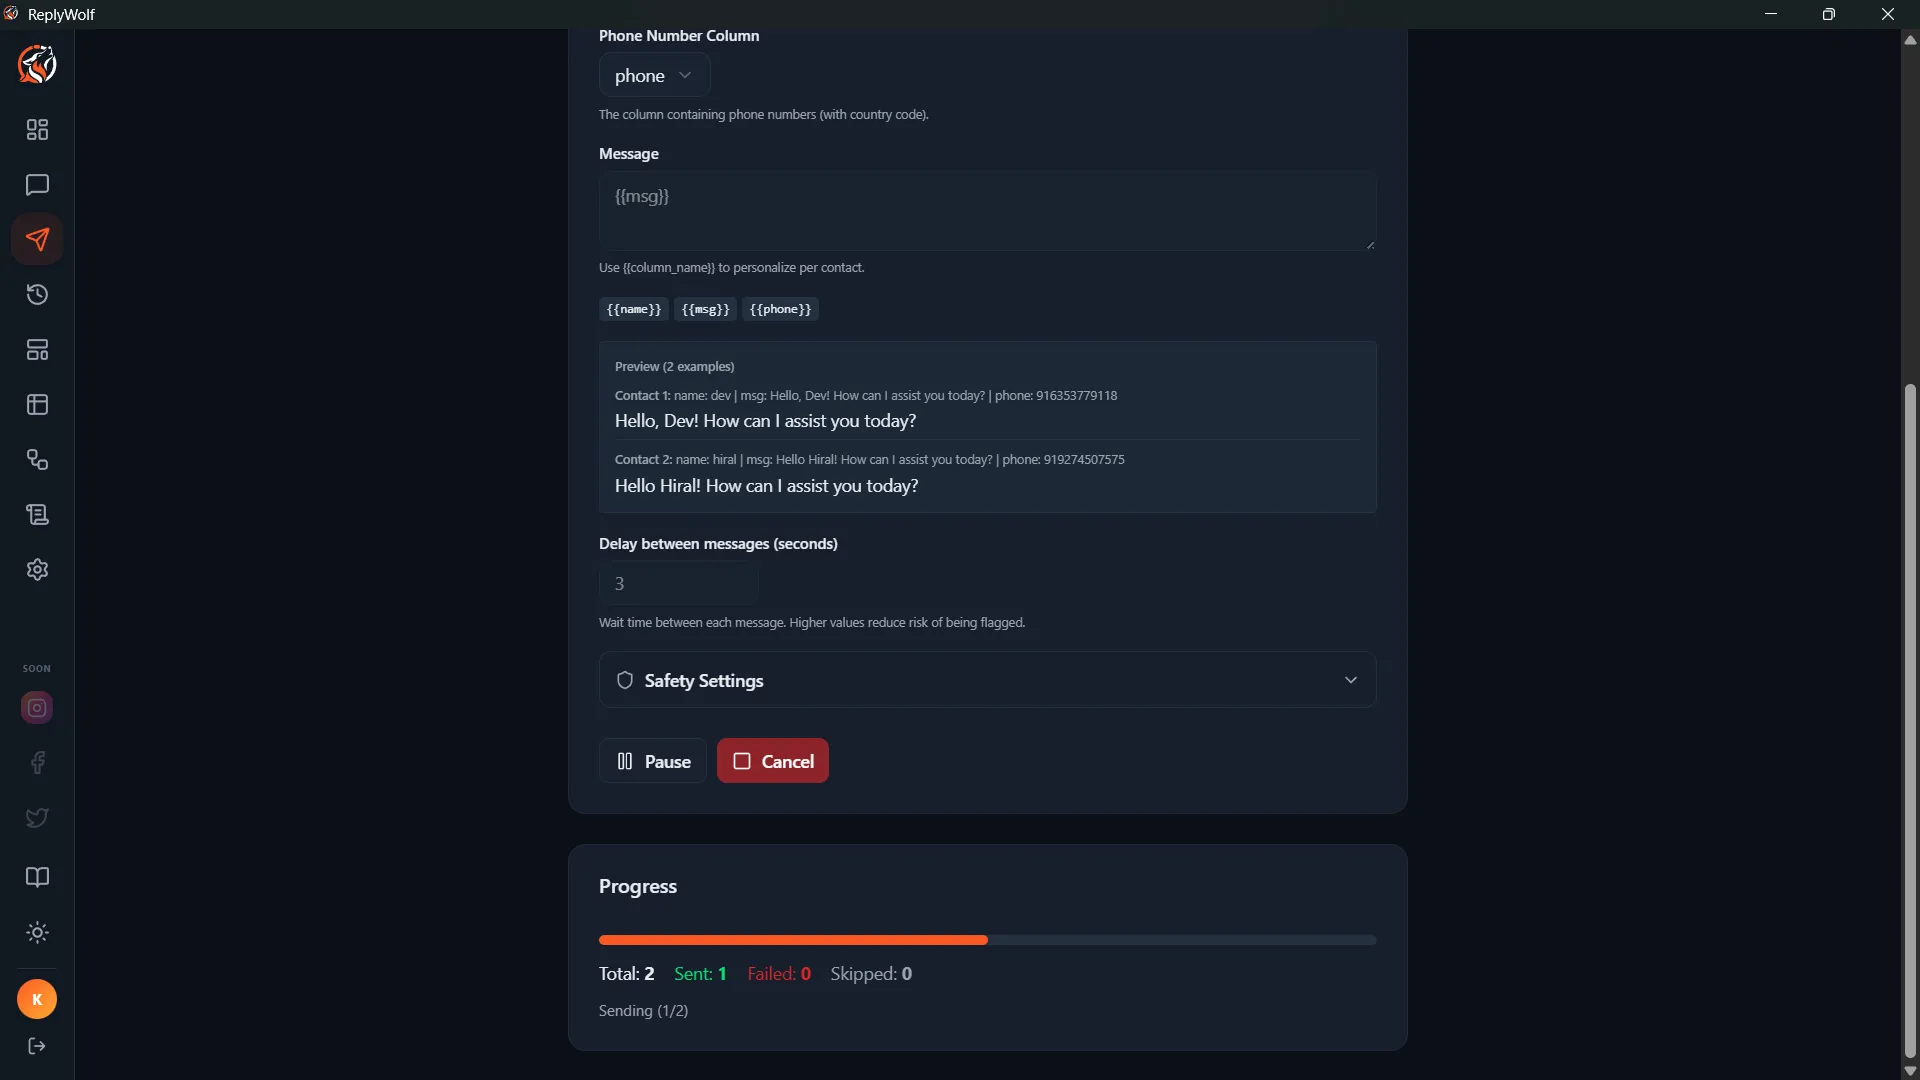
Campaign Controls
While running, you can:
- Pause -- Temporarily halt sending. You can resume later.
- Resume -- Continue a paused campaign from where it left off.
- Cancel -- Stop the campaign entirely.
- Retry Failed -- After the campaign finishes, retry any messages that failed.
Campaign History
Go to the Campaigns page to see all past and active campaigns. Each campaign shows its status, message counts, and when it was created.
Campaign statuses include: running, paused, completed, failed, cancelled.
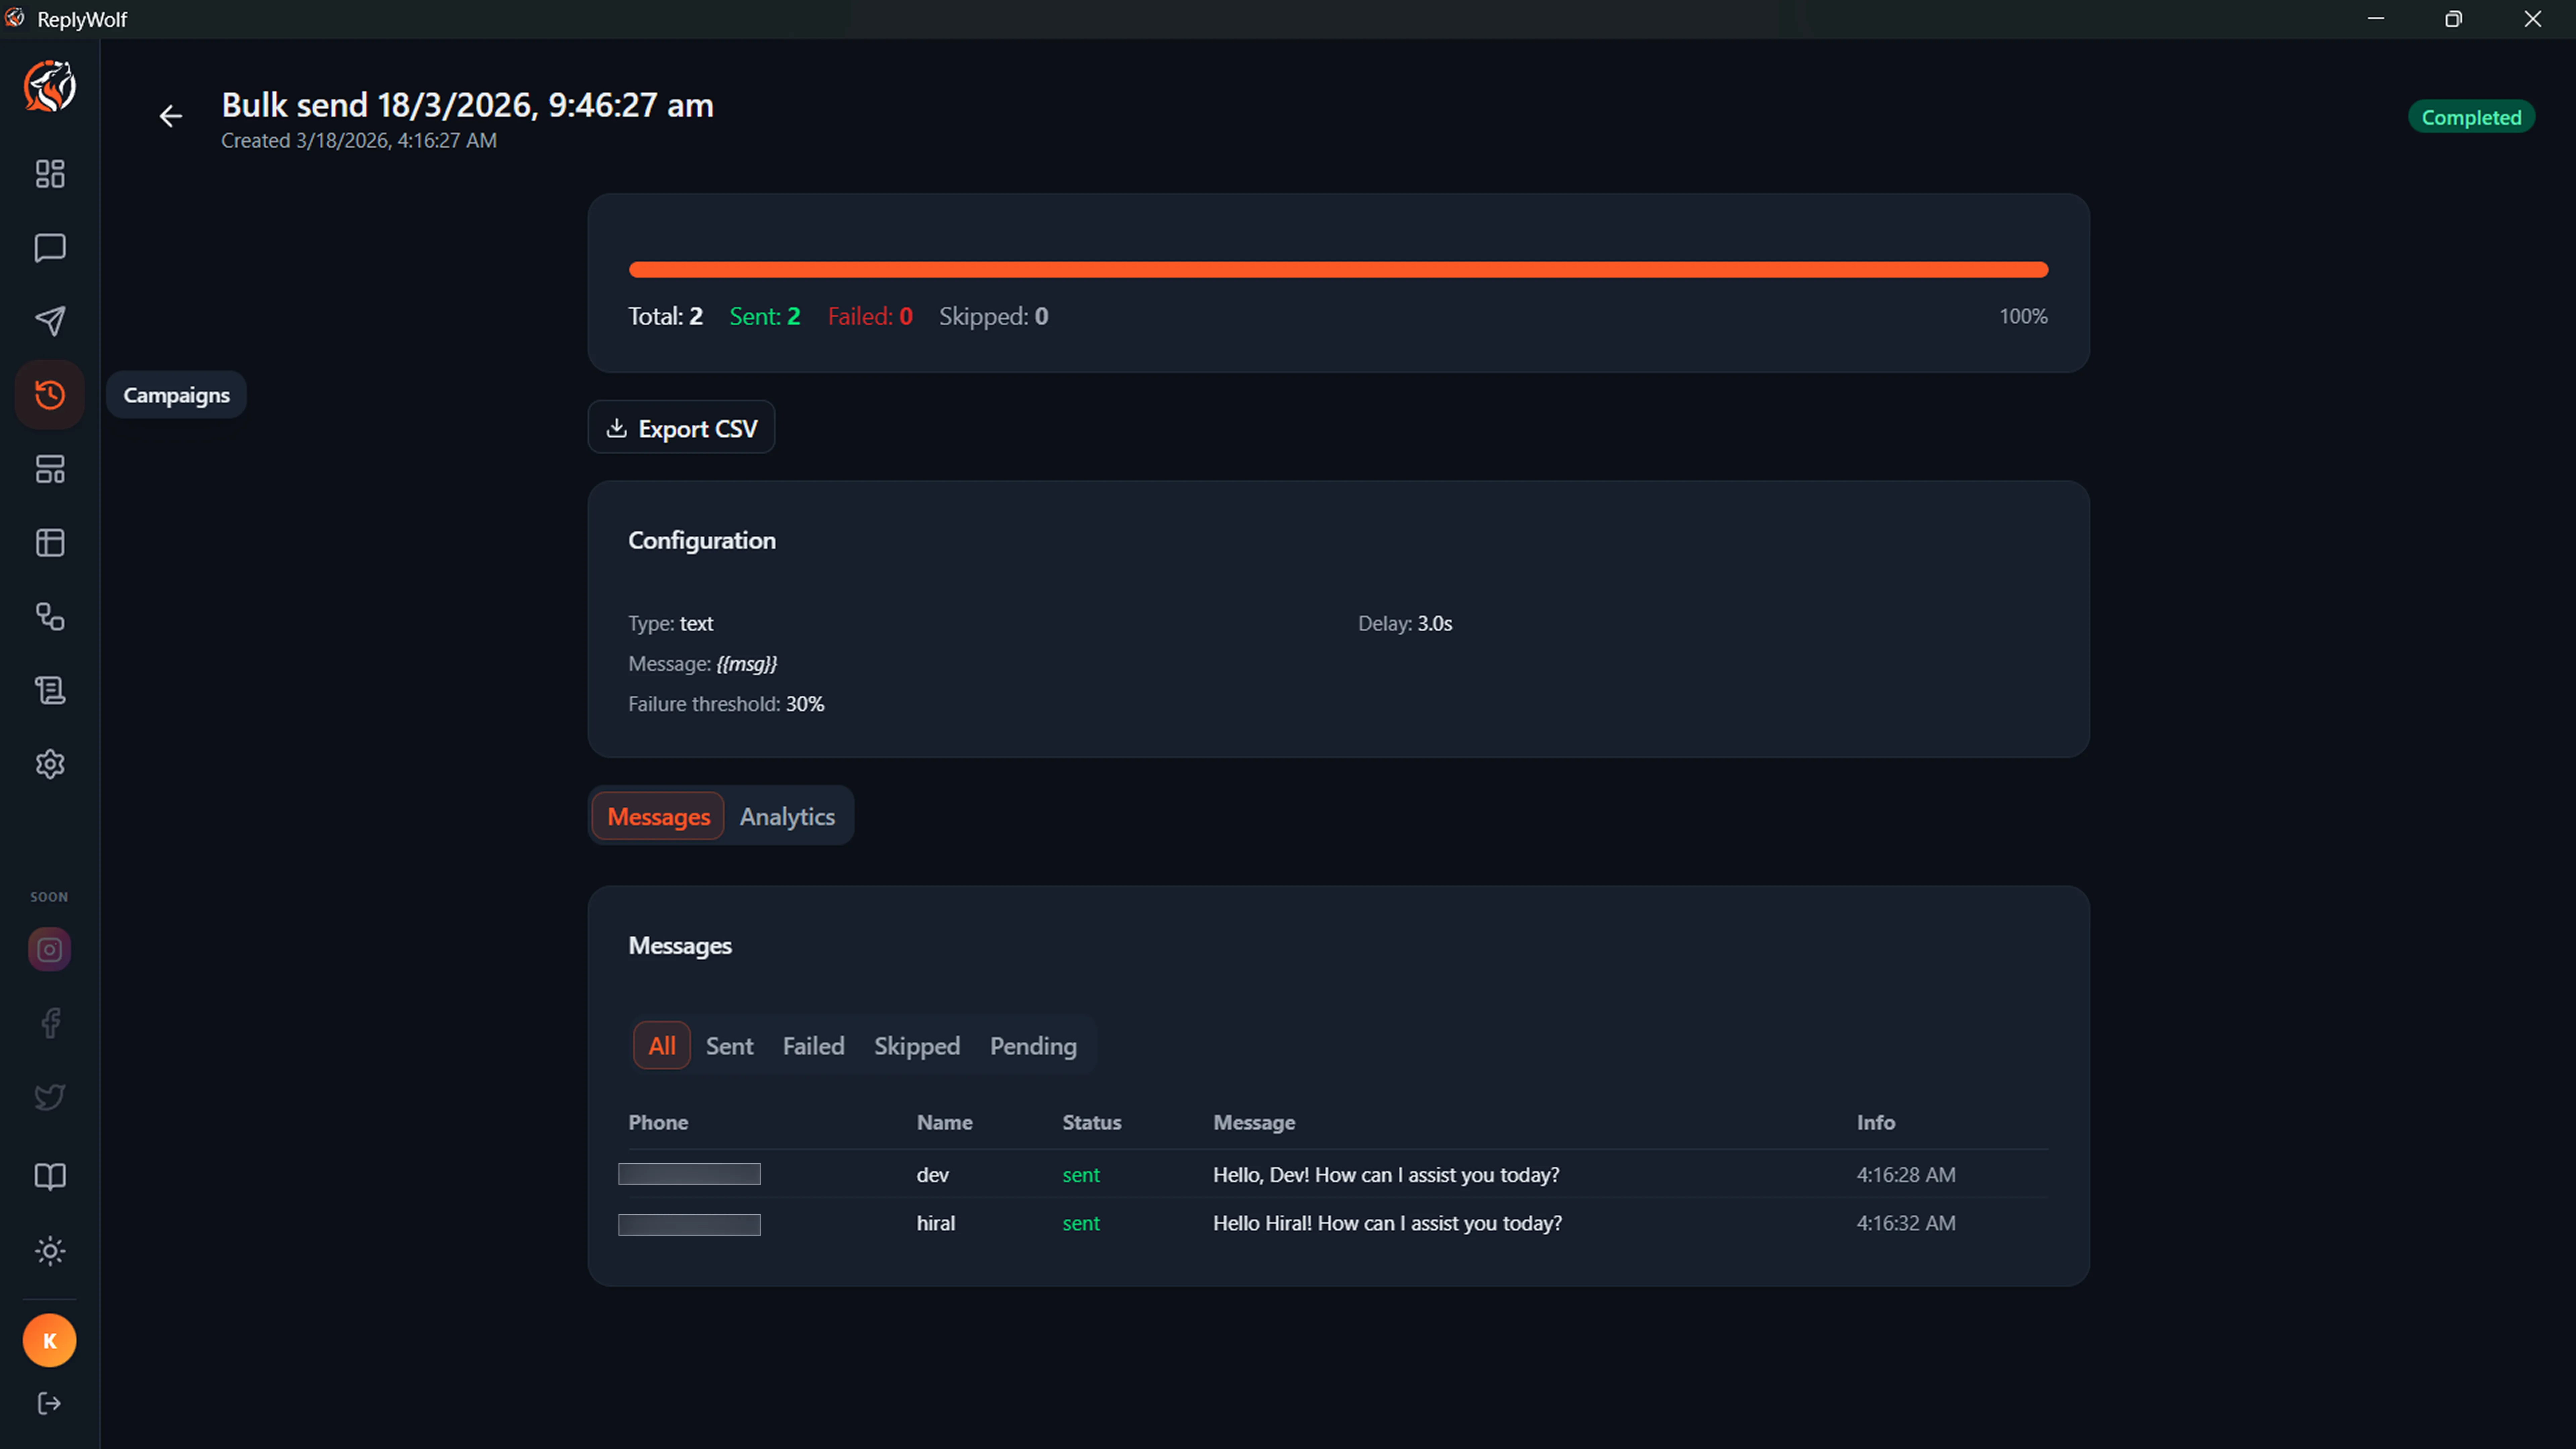
Campaign Detail Page
Click any campaign in the history to see its detail page, which includes:
- A progress bar with sent/failed/skipped counts
- Campaign configuration (message type, delay, safety settings)
- An Analytics tab with visual breakdowns
- A Messages tab showing per-contact delivery status, filterable by status (sent, failed, skipped, pending)
- Export CSV to download the full delivery report
Campaign Analytics
The Analytics tab on the campaign detail page gives you a visual breakdown of campaign performance.
Timeline
A bar chart shows message delivery over time. Use the Hourly / Daily toggle to switch between views -- hourly is better for short campaigns, daily for campaigns that span multiple days.
Delivery Stats
At a glance, you can see:
- Delivery rate -- Percentage of messages successfully delivered
- Avg. delivery time -- Average time between sending and delivery confirmation
- Failure breakdown -- Each failure reason is listed with its count and percentage, sorted by frequency
Comparing Campaigns
You can compare the performance of multiple campaigns side by side:
- Go to the Campaigns page (campaign history)
- Check the boxes next to 2-4 completed campaigns
- Click the Compare button that appears in the header
The comparison view shows a table with each campaign as a column, including:
- Name, type, and status
- Total messages, sent, failed, and skipped counts
- Delivery rate (color-coded -- green for best, red for worst)
- Duration
- Top failure reason
This helps you understand which messaging strategies work best.